• Home
  • About me
  • What you’ll find where
    • Beauty
    • Books
    • Family
    • Health
    • Life
    • Lifestyle
    • Travel
  • Let’s work together
  • Get in touch

Conversations through the middle

Life from a (slightly) more mature perspective

Cook up a feast – book review

February 3, 2014

Mary Berry’s latest offering is a paperback version of her Cook Up a Feast, which caters specifically to large families, events and celebrations. The recipes are calculated to serve six or 12 and cover a whole range of occasions from informal lunches to swish dinner parties. The most I’ve ever catered for apart from kids’ parties (and I don’t think marmite sandwiches and fairy cakes count here really) is seven people – my family when growing up – and the thought of having to work out timings and courses preparing food for a crowd brings me out in a cold sweat. Timing is not really my forte as Dot would probably tell you if you asked her. 

This book is full of helpful tips, advice on planning, creating an atmosphere, preparation and freezing food, as well as recipes covering starters, mains, desserts, drinks and of course baking. Whether it’s a stand-up buffet, sit-down dinner party, afternoon tea or picnic Mary and her co-author Lucy Young serve up recipes to help get you through them all.

I would say that a lot of the recipes include lots of ingredients, so if like me, you tend to be attracted towards the simpler the better, don’t be frightened. They all look doable as far as I can see and the instructions are all clearly laid out on the page.

I haven’t tried cooking any of the dishes yet, but I’ve got my eye on the coffee and walnut cupcakes (damn you sweet tooth), and I think I’ll try the Hot Mustard Spiced Beef in my slow cooker later this week.

Cook up a Feast is out today and costs £14.99 from Dorling Kindersley www.dk.com

Filed in: Uncategorised • by Lisa •

Foodie Friday – quick, quick brownies

October 26, 2012


I found this recipe when I was browsing the internet looking for something I could bake for Dot mid week. I was after something quick, nothing complicated and something with a bit of a yum factor. After a few hours timewasting when I should have been working, and countless recipes later, I came across these brownies.

Last time I made brownies they were so rich (too chocalatey, yes there is such a thing, so overpowering they made you gag) and they took ages to make. This time I had none of that. I baked them today and they turned out, well, different, but nonetheless delicious with lots of yum factor – or so Dot tells me…


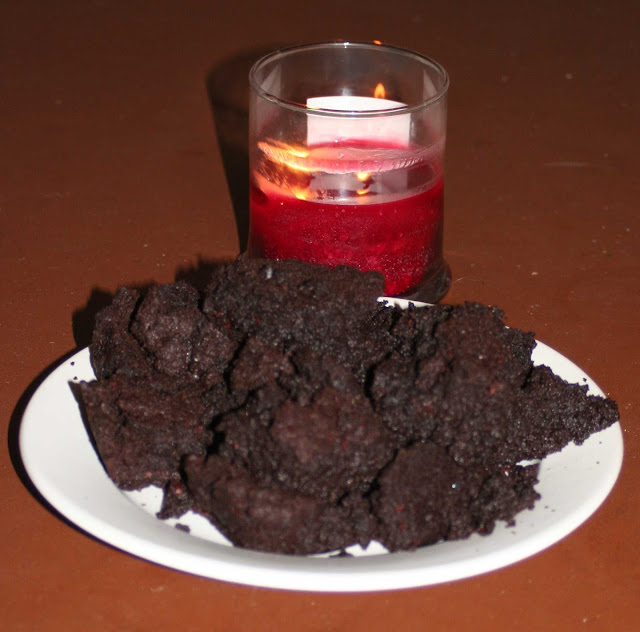
Chocolate brownie or Christmas pudding?


Ingredients 
200g butter or margarine
165g cocoa powder
400g light brown soft sugar
1 teaspoon vanilla extract
125g plain flour
2 eggs
100g chocolate chunks (or broken chocolate)
Method 
1. Grease and line a 20 x 18cm tin. Preheat the oven to 180°C / gas mark 4.
2. Melt the butter and cocoa together in a saucepan. Add the sugar and vanilla. Mix thoroughly.
3. Remove from the heat and mix in the flour then the eggs. Mix and add the chocolate chunks (or broken chocolate). Pour into the baking tin.
4. Bake for 20 minutes. The brownies are cooked when the top is slightly springy.
5. Cool and cut into 15 slices.

See, it looks like mud!
Just a couple of things to add to this:
Nothing in the recipe tells you where to put the chocolate chunks (!) so I added them to the final mixture, just before putting the tin in the oven. I also used a 100g bar of chocolate instead of chocolate chunks – I used one with 70% cocoa and it also contained cocoa nibs (they are the little bits you can see in the photos). I have to say Dot had great fun bashing the **** out of the chocolate bar so we ended up with lots of little bits.

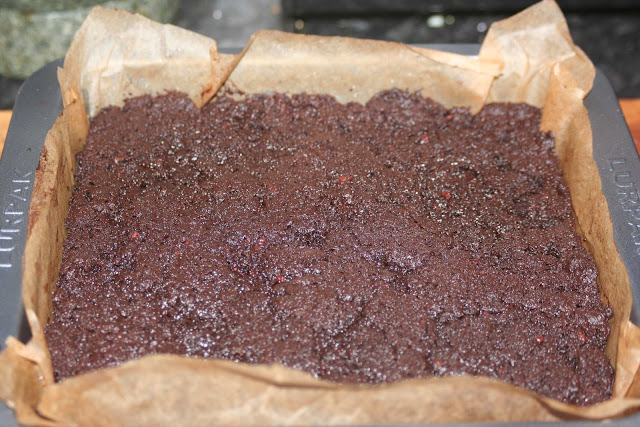
I’m not a great cook. Or a great baker. That much is obvious from the photographs. My brownies look like mud, and nothing like they look in the picture on the website. When they came out of the oven there were pools of liquid lying on top; the brownies looked more like Christmas pudding than brownies. When they had cooled and I cut them into squares, well they weren’t squares. Some of them resemble squares, the rest simply mashed up into bits. I left them in the oven longer than 20 minutes, just because of the liquid pooling on top. So when I tried to cut them they were rock hard on the edges but soft towards the middle.

Yet I think that worked and I have discovered something new. They are gooey but chewy, hard yet soft, they should be awful but they taste delicious. Not to blow my own trumpet, but both Dot and OH couldn’t get enough of them. And me, well I tasted a tiny bit, despite the diet, and I think they are wonderful!

Filed in: Uncategorised • by Lisa •

Foodie Thursday – Canapés: the recipes

October 11, 2012


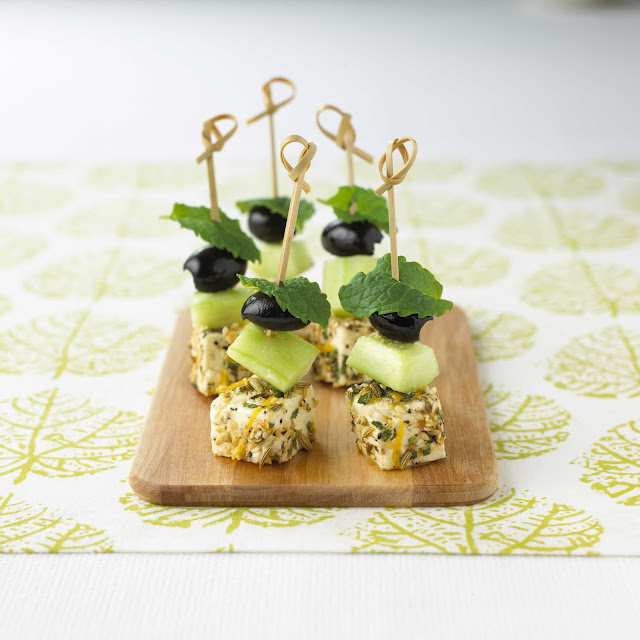
Fennel-marinated feta and olive skewers

As this recipe tastes so fresh and clean, it will work well with richer dishes. It makes a delicious vegetarian option.

Makes 20

Ingredients
2 tbsp sesame seeds
200g feta cheese
1 tbsp fennel seeds
Grated zest of 1 lemon
1 tbsp lemon juice
2 tbsp olive oil
11⁄2 tsp cracked black pepper
15g mint, finely chopped
1⁄2 cucumber, peeled and seeded
20 mint leaves
10 pitted black olives, halved
Essential equipment
20 wooden skewers (5cm)
1 Toast the seeds in a dry pan over low heat until nutty and golden, 3 minutes. Cool.
2 Gently rinse the feta in cold water. Drain on paper towels.
3 Cut the feta into 2cm cubes. Toss the feta together with the fennel, toasted seeds, lemon zest and juice, oil, and pepper to coat each cube well. Cover and refrigerate for 4 hours to allow the flavours to combine.
4 Sprinkle the feta with chopped mint and toss to coat each cube well.
5 Cut the cucumber into 20 cubes (1cm).
6 Thread 1 mint leaf, 1 olive half, 1 cucumber cube, and 1 feta cube onto each skewer. Serve chilled or at room temperature.

Get ahead: Marinate the feta up to 3 days in advance. Store in an airtight container in the refrigerator. Skewer the feta up to 4 hours in advance. Cover and refrigerate.


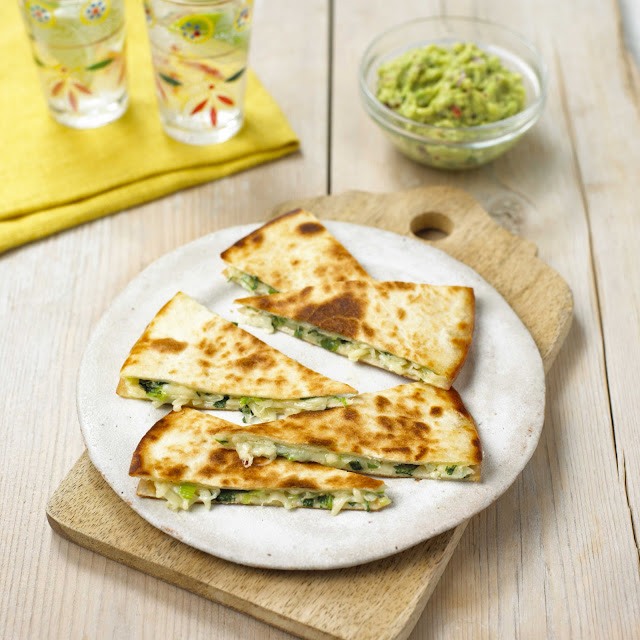
Classic cheese quesadilla with green chilli, coriander, and avocado salsa

These are simple, versatile and fun party or picnic food. Serve with fresh salsa, avocados, limes and tomatoes.
Makes 24
Ingredients
For the salsa
2 ripe avocados
1⁄2 red onion, very finely chopped
1⁄2 red chilli, seeded and chopped
Juice of 1 lime
Salt and freshly ground black pepper
1 tbsp olive oil
Dash of Tabasco sauce, or to taste
For the quesadilla
4 flour tortillas (18cm)
175g grated Swiss Gruyere cheese
30g coriander, finely chopped
1 bunch spring onions, trimmed and finely chopped
1 green chilli, seeded and finely chopped
Salt and freshly ground black pepper
Olive oil
Essential equipment
Large non-stick frying pan
Fish slice or palette knife
1 For the salsa, skin and stone the avocado. Finely chop or mash the avocado with the remaining ingredients and taste for seasoning.
2 Place 2 tortillas on the work surface. Divide the cheese, coriander, spring onions, chilli, and salt and pepper evenly between them. Press the 2 remaining tortillas on top to make a sandwich.
3 Heat a large frying pan with a drizzle of oil. Sear tortilla sandwiches over medium heat, 2–3 minutes on each side, or until light golden in colour and crisp. Flip with a fish slice or a palette knife.
4 Cut each quesadilla into 12 wedges and serve with avocado salsa.
Get ahead: The quesadillas can be made several days ahead, covered, and kept in the refrigerator until you need them. You can fry them and keep warm in a low oven to serve to your guests.

These recipes are from Canapés by Victoria Blashford-Snell and Eric Treuille. The book is published by Dorling Kindersley and costs £14.99. For more information please visit www.dk.com


Filed in: Uncategorised • by Lisa •

Baking class – chocolate muffins (the best ever)

June 16, 2012

So I’m up early today baking muffins for the village summer fete. It’s a combined village/school fete this year, partly because of the Jubilee and also I think because of building work going on to extend the primary school. The fete is held in the village hall and of course Dot brought an empty cake box home on Thursday, which loosely translated means ‘please donate cakes to the tea shop so we can sell them back to you’.

My contribution was a batch of chocolate muffins which are ever so simple to make but taste delicious. Usually they are darker than than the ones pictured above, but I didn’t put in so much cocoa this time as I knew children would be eating them. I added dark chocolate chips to most of them, except the couple I was saving for Dot, which also have white chocolate chips as you can see. I advise against white chocolate chips for cakes you’re going to give for events or as gifts, as they toast and can look quite brown and burned, making them look less appealing. Dot loves them like that though so no problem for home eating.

I wish I could take credit for the recipe but I can’t. It’s from Muffins: Fast and Fantastic by Susan Reimer and it is the recipe I use the most as it comes out brilliant every time.

255g self-raising flour
1/2 teaspoon bicarbonate of soda
1/2 teaspoon salt
110-170g caster sugar
3-5 tablespoons cocoa powder
1 egg
240-260ml milk
1 teaspoon vanilla essence
90ml vegetable oil
Chocolate chips for decorating

1. Heat the oven to 190-200°C , 170-190°C fan, or gas mark 5-6. Prepare muffin tin.

2. Sift together the flour, bicarbonate of soda, salt, caster sugar and cocoa powder.

3. In a separate bowl, beat the egg, then add the milk, vanilla essence and oil, and stir.

4. Pour the wet mixture into the dry ingredients. Stir until just combined and there are no dry bits of mixture left. Do not overmix or the muffins will be tough. The batter might be lumpy but don’t worry about it.

5. Fill the muffin cases with mixture, about three quarters full. Sprinkle chocolate chips over the muffins. Place in oven and bake for 20-25 minutes. When cooked, the tops should be slightly springy and the insides moist and just cake-like.

This recipe is so simple and I don’t think there’s anyway it can go wrong. For me, it has always worked beautifully and the muffins taste better than any I’ve bought in the shops. I’m sure you’ll be converted after trying them but let me know what you think!

Filed in: Uncategorised • by Lisa •

  • 1
  • 2
  • Next Page »

I live in the countryside with my dogs and cat, and I love horses, yoga and running (sometimes). Writing is what I do - I've tried other things, but keep coming back to it. And I'm learning to meditate.
About me

Popular posts

review-st-johns-newfoundland-canada

Visiting Newfoundland: St John’s

Alcohol-free life

Deodorant by any other name…

Mental-Health-Day-2022

World Mental Health Day

Black-and-white-dog-wearing-birthday-party-hat

Birthday present

Categories

Archives

Copyright © 2025 · Theme by Blog Pixie